

 This Adobe software was the absolute foundation to our product, its incredible and incomprehensible capabilities never cease to impress and astonish me and without these our media products wouldn't of existed, and without the opportunity to explore this software our enriching knowledge and awareness of the realms of both media print and video production wouldn't have existed. In specific case to the three tasks, without the software we would not have been able to create professional appearing media products.
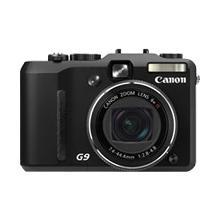 Afterr overcoming technical difficulties with the video camera whist out shooting on our first day, we used our iniciative and decided to film our footage on my camera a Cannon Powershot g9. 12.1 megapixels. The camera was sold to me with the knowledge that its quality in image is equal to its quality in video, this I remembered when suggesting we use the camera. This was actually a blessing in disguise as the positive factors of shooting footage onto a memory card is vast, although it does have a negative as you need many memory cards as appose to one a couple of tapes, but the security and instant behavior of a memory card proved to be useful, we could also re-watch the footage on the large play back screen instantly without worrying about winding the tape wrongly. To upload our footage to the computer we therefore used a memory card reader, this was quick and efficient compared to using the video camera capture tool for our practice video, this saved time and stress which we found extremely useful.
The other camera we used for our digipak photography was Hannah's Cannon SLR, the amazing fish eye lens manipulated our photos and was what set them apart. Using such a high class camera instantly gave our photography a professional finish.
When editing it was important to use the zoom tool, especially when working during the fast pace of the editing, working far out in unpredictable but again Final cuts ability to zoom far into the time line is genius. Another key fact was locking particular levels of the time line to prevent cuts that had been editing to move away from the music placing. The music track was lock permanently however when dragging clips from the library of clips the audio was atomically attached, thus you had to lock the levels of footage to delete the audio, if the levels were not locked it would delete the footage as well as the audio! If for instance one clips that had to be taken from a section of editing you would need to drag it directly to the level above, lock the lower layer, edit the clip you removed, unlock the lower layer and replace the clip all the prevent the time line automatically being shifted and eradicating minutes of precise editing. I know right..
The fine details of production
Post production effects:
Transitions - Cross dissolves - Fade in fade out dissolve
We used dissolves mainly during the slower parts of the track as it reflected the pace. but also to establish fading in and out of flash backs to enhance narrative.
Colour correction: was an important factor to our video to create a professional finish, a RGB balance Brightness/contrast bringing alive the already vivid colourings of mise en scene De-saturation also used to establish flask backs Overlays Soft edges - Vignette
Wide screen - this was a convention established, that all music videos are shot on a wide screen camera, however as we do not have the equipment to so we used the effect on final cut, this make the video appear professional.
When it comes to applying any of these effects onto footage there is one key factor...
Remember to Render.
All effects and transitions on Final Cut can be altered to your personal liking, once the have been changed they can then be dragged over the shot on the time line, each shot has to be rendered for the effect to be added, however if you hold the time line arrow over the shot whilst you drag the effect over you get a preview of what the effect looks like, which saves time.
To dramatise and bring alive the lighting / colourful mise en scene, we changed the contarst of almos t every shot, changable to each of its particular level of lighting. This again was a case of trial and error, changing the levels using the mouse or arrow keys before dragging it down over the clip and seeing its
  result.
Overlay that up!
To the left is a screen shot of how an overlay is created. One layer of film is put onto a higher level in the time line above the other. In the bottom far left hand corner is a button with what appears to be a mountain shape. You have to click this so that the black lines which run through each shot shown above is visible. These lines are dragged up and down, the further down the less opaque that image, more transparent so the other image appears through. Again trial and error is used when moving the lines, with the time line arrow kept over the two shots so that the preview box shows what the effect will appear like. This image also illustrates the change in lengths of cross dissolves and fades, the top overlays needs to be faded in an out so that it was seamless. image of the toggle button in the bottom left hand corner which allows you to create overlays
Colour correction: RGB balance - T his effect allows you to specifically change the tonal qualities of an image. By increasing the number of each you are highlighting that particular tone in the image. We increased the Red balance during the bedroom scene for example. The screen shot below shows where you ca
 n change the balance by moving the toggle or for precarious change clicking on the small arrow either side of the spectrum time
  line.
line.
Cross dissolves and Fade in Fade out transitions
God almighty what important features to producing a video. These effects are changeable but only in length, to change the length of a dissolve you drag the effect between the two desired shots, the dissolve drops its self over half of each cut aside it, then clicking and holding down on one side of the dissolve you can drag the dissolve to the acquired length, using the zoom tool for precision. Being able to change the lengths of the transitions as it is extreamly important, a longer dissolve will slow down the pace of the music, if the dissolve is too slow however it can off set the editing.
Brightness and contrast how we love youhis effect allows you to specifically change the tonal qualities of an image. By increasing the number of each you are highlighting that particular tone in the image. We increased the Red balance during the bedroom scene for example. The screen shot below shows where you can change the balance by moving the toggle or for precarious change clicking on the small arrow either side of the spectrum time line.Cross dissolves and Fade in Fade out transitions
God almighty what important features to producing a video. These effects are changeable but only in length, to change the length of a dissolve you drag the effect between the two desired shots, the dissolve drops its self over half of each cut aside it, then clicking and holding down on one side of the dissolve you can drag the dissolve to the acquired length, using the zoom tool for precision. Being able to change the lengths of the transitions as it is extreamly important, a longer dissolve will slow down the pace of the music, if the dissolve is too slow however it can off set the editing.
To dramatise and bring alive the lighting / colourful mise en scene, we changed the contarst of almos
t every shot, changable to each of its particular level of lighting. This again was a case of trial and error, changing the levels using the mouse or arrow keys before dragging it down over the clip and seeing its result.Overlay that up!
To the left is a screen shot of how an overlay is created. One layer of film is put onto a higher level in the time line above the other. In the bottom far left hand corner is a button with what appears to be a mountain shape. You have to click this so that the black lines which run through each shot shown above is visible. These lines are dragged up and down, the further down the less opaque that image, more transparent so the other image appears through. Again trial and error is used when moving the lines, with the time line arrow kept over the two shots so that the preview box shows what the effect will appear like. This image also illustrates the change in lengths of cross dissolves and fades, the top overlays needs to be faded in an out so that it was seamless.
 image of the toggle button in the bottom left hand corner which allows you to create overlays
Screen grabs from final cut, using the media
Here the screen shot captures the moment of a desaturated flashback, we needed to do this for differentiation so the footage was destaurated to a high level. Also an effect called soft edge was used, you could change the level of soft blackness for each side.

The cross dissolve before our protagonist begins to lip sync. The cross dissolve as you can see is relatively long to fit to the pace of the music.
 If you look closely at the time line you can see the repetitive nature to our introduction. Using fade in fade out dissolves between each flashback, the lengths of these were precisely the same so that the editing was sharp.
One of our favorite overlays produced, the brightness and contrast changed so that the two images blended correctly. Below is a screen grab of the gate shot which was tedious, and a mash up of overlays, cross dissolves and fade to blacks, zoomed fully in we worked closely with the razor tool, cutting up a very long section of film to find the action we wanted, then laying them aside each over on the time line overlaid the images which would look best together, his positioning had to be exact for the effect to work.
 Beginning to use the Final cut software and gaining knowledge of it relies greatly on trial and error which is really what determined our time management when editing the video; along with our personal weakness of being too precise and our attention to detail with everything which resulted in us almost unable to produce a rough cut as we personally wanted to go over each section with a fine tooth comb.
Although we were limited by our own knowledge of the Final cut software it was the amazing ability of the programme that enabled us to extend the creative control we had over our ideas/original footage and actually produce the, what we thought would be, almost impossible ideas in our imaginations. The complimentary software Adobe Indesign and Photoshop we were already at home with because of our AS coursework, thus this is why the digipak and magazine advert tasks took far less time.
Using the magic lasso tool and changing opacity of layers to create this is photoshop

Using photoshop elements - My home programme.
 Indesign's automatic alignment programming was again extremely useful to create our simplistic yet stylish design. Font changing size was made easier by holding down command and dragging the text box, as this changes the width and height of the text to fit.
No comments:
Post a Comment